Hide

Error message here!

Lost your password? Please enter your email address. You will receive a link to create a new password.

Error message here!

Back to log-in

Close
grains

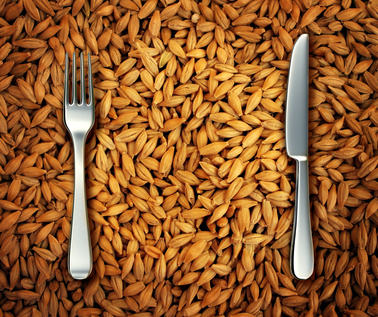
Gluten, Grains & Good Nutrition

Good grief! Are grains really all that bad for us? To listen to some athletes talk, you’d think grain foods are the dieter’s demon. Often demoted to being “just carbs,” whole grains are actually a beneficial part of a sports diet. But to the detriment of many athletes, grain foods—in particular, wheat— have gotten a bad rap in the past few years.

Meta Slider - HTML Overlay - Pregnant woman holding fitness dumbbells

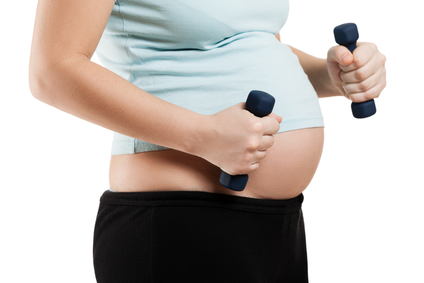
Strength Training During Pregnancy

Pregnancy is a time of many physical changes for a woman, and recent research has shown that maintaining or even starting an exercise program can provide benefits to pregnant women and their babies. The majority of research has focused on cardiovascular exercise, but the importance of strength training during pregnancy is often overlooked.

Matt Cavalo Photo

Fearing the Gym after Injury or Illness

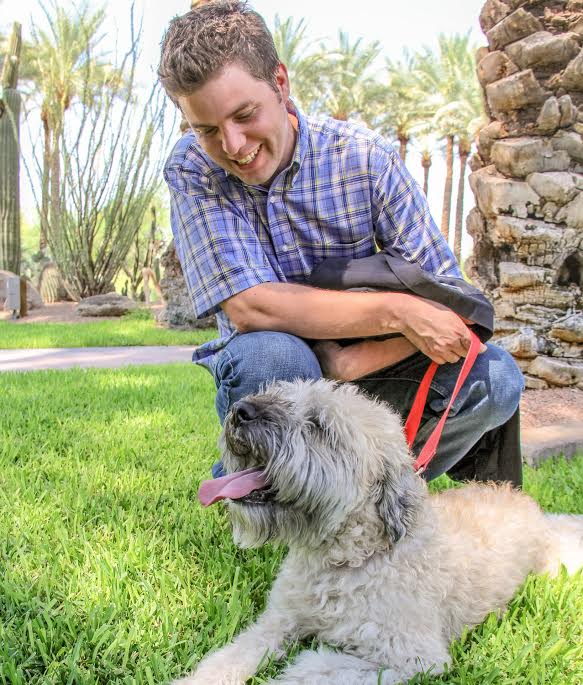
One of the activities my wife and I used to really enjoy doing together was going to the gym. We had a personal trainer named Eric. Eric was funny, knowledgeable and understood how to maximize the workout for both me and my wife. Having a personal trainer that understood both our individual needs kept us motivated to workout. Eventually we moved and got a gym membership. However, we did not sign up with a personal trainer and the gym experience was no longer that unified activity we enjoyed together like we did when we worked out with Eric.

Todays Dietitian1

The Potential Danger of Acrylamide

This chemical in foods has been shown to cause cancer in mice but more research is needed to determine its risk in humans. Did you know that if clients broil, fry, toast, bake, or barbecue starchy foods, such as bread and potatoes, they can increase their intake of the chemical acrylamide? The more the food browns, the more acrylamide is present.

gellert-hip1

The Hip Complex: Understanding the Science Behind Both Movement and Dysfunction

Introduction

The foot is where movement begins requiring mobility to initiate daily and sport specific movements. However, the knee however, requires stability with daily movements, but more importantly, dynamic sport movements such as soccer or football. The hip, like the ankle, requires mobility, to perform such simple movements as sit to stand, climbing stairs and other functional movements. In this article, we will review the anatomy of the hip, common injuries to the hip, functional assessments and training strategies to work with clients with previous injuries.

Figure 2. Hip joint with supporting ligaments

Hip joint with supporting ligaments

Let’s look at the basic anatomy of the hip. The hip joint is a multi-axial ball and socket joint between the femoral head and the acetabulum, similarly to the shoulder joint. The hip is surrounded in white, several ligaments that provide support and stability.

The labrum attaches to the acetabulum deep within the socket between the femur and acetabulum. The joint is covered by a capsule blended with three strong ligaments: iliofemoral or “Y” ligament, which resists extension, the ischiofemoral ligament, which resists extension and internal rotation, and the pubofemoral ligament, which resists abduction.

Muscularly, the glute medius and minimus are located along the anterolateral aspect of the hip to stabilize in the frontal pane, whereas the glute maximus, is located in the sagittal plane posteriorly to facilitate hip extension.

gellert-hip3

Supporting muscles around the hip

Common injuries and causes

There are different types of injuries the hip can sustain. The most common are the hip osteoarthritis, iliotibial band syndrome and total hip replacement. In this next section, we will review each condition providing a deeper understanding of each.

gellert-hip4

Osteoarthritic hip on left, normal hip on right

a. Hip osteoarthritis(OA)

Mechanism of injury/pathophysiology: A degenerative process of varied etiology which includes mechanical changes within the joint. O.A. affects some 40% of those aged over 65 in the community may have symptomatic OA of the knee or hip(Zhang, W. et al 2007).

Pathophysiology: Osteoarthritis (OA) is a relatively common musculoskeletal disorder, with a high prevalence that increases with age. O.A. is a degenerative process of varied etiology, which includes mechanical changes within the joint (Pisters, M., et al 2007).

Risk Factors: Excessive weight born on hip joint, muscle imbalance, repetitive stressors.

Sign and symptoms: Pain in the a.m. described as “achy” that decreases as the day progresses, pain with weight bearing or walking, difficulty squatting, and lateral thigh discomfort. Patients will describe of pain and stiffness in the a.m. described as “achy.” During the day, movement and activity, improves mobility and activity(Fernandes, L et al 2010). However, the volume of activity if too much, will increase pain. Patients typically have pain with weight bearing or prolonged walking, difficulty squatting, and lateral thigh discomfort.

Medical treatment: Non steroidal (NSAIDS)(examples are Ibuprofen/Advil).

gellert-hip5

Iliotibial band syndrome

b. Iliotibial band syndrome(ITB)

Mechanism of injury: Iliotibial band syndrome (ITBS) is a common injury of the lateral(outside) aspect of the knee particularly in runners, cyclists and endurance sports. ITBS is the most common running injury(Ellis, R et al 2007).

Pathophysiology: ITB syndrome is a non-traumatic overuse injury caused by repetitive friction/rubbing of the distal(farthest) portion of the iliotibial band (ITB) over the lateral femoral epicondyle with repeated flexion and extension of the knee.

Contributing/Risk Factors:
• Muscle imbalances/weakness: per the research and my clinical experience, hip flexors and quadriceps are stronger and than the hamstrings.
• Shoe support-important to rotate running shoes every 6 months or 500 miles according to multiple podiatrists I have worked with over the years.
• Increased bouts of running, altered foot mechanics-ie. Orthotics or need for orthotics.
• Lack of stretching, particularly tight ITB, hip flexors and quadriceps. Contributes to increasing compression along the outer hip.

Sign and symptoms: Lateral knee pain over the lateral condyle of the femur described as “dull/achy” that gradually develops & worsens particularly with running. Pain then becomes “sharp” in nature.

c. Total hip replacement

Mechanism of injury: Osteoarthritis is a musculoskeletal condition that develops over time affecting primarily the hip and knee joints. O.A. affects some 40% of those aged over 65 in the community may have symptomatic OA of the knee or hip(Zhang, W. et al 2007).

Pathophysiology: Osteoarthritis (OA) is a relatively common musculoskeletal disorder, with a high prevalence that increases with age. O.A. is a degenerative process of varied etiology, which includes mechanical changes within the joint (Pisters, M., et al 2007). Significant pain, decreased mobility and compromised function, are the primary reasons, a person would typically undergo a total joint arthoplasty(joint replacement). Total joint arthroplasty is a highly efficacious and cost-effective procedure for moderate to severe arthritis in the hip(Santaguida, P. et al 2008).

Common assessments

A simple functional test to assess a client’s movement pattern, is the squat. The squat is a classic fundamental primal movement that someone typically performs almost on a daily basis. With this test, you can observe how the client’s ankle, knee, hip and back moves compared to normal movement patterns.

What am I looking for?
The approach to assessment is all about asking and answering questions about movement:
• How does the client start, finish the movement?
• What strategies do they use? Do they have the appropriate flexibility to perform the movement?
• Is stability a problem? Are there compensations elsewhere in the movement sequence?

How do I interpret the movement?
• It is important to observe the client in both the frontal and sagittal planes
• Observing globally first, then examine how the entire kinematic chain is working as it relates to timing and sequence to achieve the movement

Dynamic Movement Assessments

1. Functional squat
The squat is a classic fundamental primal movement that someone typically performs almost on a daily basis. Whether it is to perform to pick something up or move an item. Therefore, it is important to assess the movement pattern a client uses during this movement.

gellert-hip6

Squat in frontal view; Squat in side view

What is required in a squat?
• Adequate ankle mobility, knee stability, hip mobility, lumbar spine(lumbo-pelvic junction) stability

gellert-hip7

In place lunge

Observations:
• Note the overall quality and range of movement in the frontal plane and sagittal plane
• Note the symmetry or lack of symmetry with the movement
• Note the point of transition from descending to ascending
• Note if there is an shaking(juttering), which indicates weakness in the lumbo-pelvic junction affecting the entire kinematic chain

Another simple assessment is an in place lunge, which examines one’s control through the entire kinematic chain. The lunge is another fundamental primal movement. The lunge is a dynamic movement that is typically performed during daily activities (stooping down to pick something up) or as part of an athletic movement. This test examines ankle control, knee control and pelvic movement in the sagittal plane.

Training strategies and programming for hip injuries

With any injury, the most important thing to remember is the type of injury, healing time and prior level of function of the client. Let’s begin with ankle sprains.

gellert-hip8

SLS stance with TRX

a. Hip Osteoarthritis(O.A.)

gellert-hip10

ITB stretch

Recommendations for training: Aqua therapy has been shown in the research to significantly reduce pain, improved physical function, strength, and quality of life(Hinman, Rana S., et al 2007), stretching ITB, hip flexors, quadriceps and hamstrings, strengthening weaker hip abductors(glute medius/minimus). Strengthening specifically hip abductors in various studies when compared to general strengthening, resulted in significant reduction in knee pain, objective change in functional outcome tests, physical function and daily activities(Bennell, K.L., et al. 2010 & Hernández-Molina, G et al. 2008). Core strengthening should also be an integral part of the training program.

b. ITB Syndrome

Recommendations for training: Important to keep stretching the ITB after exercise. Client education on the changing of running shoes every 500 miles or 6 months is key. Resistance training should focus on strengthening weaker phasic muscles (glute medius, minimus and maximus), which are required to stabilize and push off during running. Dynamic core strengthening should always play an integral role of training. Use of aqua therapy can be extremely beneficial and relaxing. It is very important to educate the client on the importance of cross training(ie. yoga, pilates, hiking, and swimming to condition the lower extremity muscles.

c. Hip replacement(THR)

Bridging with physioball

Bridging with physioball

Recommendations for training: Prior to commencing training, it is important to clarify with client, that there are no other underlying health issues. Important to follow hip precautions: avoidance of crossing affected leg towards midline(adduction), and squatting past hip flexion 90 degrees. Training should focus on strengthening weak glute medius/minimus, glute maximus and hamstrings. Effective and safe exercises include; in place lunges, diagonal lunges, seated leg extension and seated leg curl machine. Core strengthening should also always begin with static exercises, and then progressed to dynamic accordingly. Safe and effective core strengthening exercises include; standing trunk rotation with tubing or cable, four point planks, and side planks. Safe dynamic core strengthening exercises include bridging with physioball, single leg bridge with physioball, traveling forward lunge with medicine ball trunk rotation, and four-point plank on physioball as examples.

Summary

The hip is a complex unit thitbdat is comprised of a multitude of ligaments, tendons, connective tissue, muscles that synergistically initiate and correct movement, and stabilize when an unstable environment. Understanding the anatomy, biomechanics and weak links of the hip, common injuries and evidenced based training strategies, should provide you with the insight to better understand and work with clients with these kind of injuries more confidently.


Written by Chris Gellert, PT, MMusc & Sportsphysio, MPT, CSCS, AMS.

Chris is the CEO of Pinnacle Training & Consulting Systems (PTCS). A continuing education company, that provides educational material in the forms of home study courses, live seminars, DVDs, webinars, articles and min books teaching in-depth, the foundation science, functional assessments and practical application behind Human Movement, that is evidenced based. Chris is both a dynamic physical therapist with 14 years experience, and a personal trainer with 17 years experience, with advanced training, has created over 10 courses, is an experienced international fitness presenter, writes for various websites and international publications, consults and teaches seminars on human movement.

REFERENCES
Bennell, K.L., et al. 2010, ‘Hip strengthening reduces symptoms but not knee load in people with medial knee osteoarthritis and varus malalignment: a randomized controlled trial,’ Osteoarthritis and Cartilage, vol. 18, issue 5, pp. 621–628.

Ellis, R., et al., 2007, ‘Iliotibial band friction syndrome—A systematic review,’ Manual Therapy, vol. 12, pp. 200–208.

Fernandes, L., et al 2010, ‘Efficacy of patient education and supervised exercise vs. patient education alone in patients with hip osteoarthritis: a single blind randomized clinical trial,’ Osteoarthritis and Cartilage, vol. 18, issue 10, pp. 1237–1243.

Goodman, Catherine., Boissonnault, William., 1998, G. Pathology: Implications for the Physical Therapist, W.B. Saunders Company, Philadelphia, pp. 267-274, 279-292, 318-328, 412- 417, 609-610, 614-615, 617-621, 660-667, 736-745, 748-755.

Hernández-Molina, G et al. 2008 ‘Effect of therapeutic exercise for hip osteoarthritis pain: Results of a meta-analysis,’Arthritis Care & Research, vol. 59, issue 9, pp. 1221-1228.

Hinman, Rana S., et al 2007, ‘ Aquatic Physical Therapy for Hip and Knee Osteoarthritis: Results of a Single-Blind Randomized Controlled Trial,’ Journal of Physical Therapy, vol. 87, no. 1, pp. 32-43.

Pisters, M., et al., 2007, ‘Exercise adherence improving long-term patient outcome in patients with osteoarthritis of the hip and/or knee, Arthritis Care & Research, vol. 62,

Santaguida, P. et al 2008, ‘Patient characteristics affecting the prognosis of total hip and knee joint arthroplasty: a systematic review,’ Canadian Journal of Surgery, vol. 51, issue 6, pp. 428-436.

Zhang, W., et al., ‘OARSI recommendations for the management of hip and knee osteoarthritis, Part I: Critical appraisal of existing treatment guidelines and systematic review of current research evidence,’ Osteoarthritis and Cartilage, vol. 15, issue 9 pp. 981–1000.

pilates woman stability ball gym fitness yoga

Pilates Exercises for Healing: Shoulder Stretches and Bridging

There are three phases of Pilates for breast cancer survivors. The goal of Phase 1, the Protective Phase, is to ensure tissue healing without sacrificing range of motion and flexibility of the chest and arm. In these exercises, only move your arms to shoulder height or 90° and during this phase try to use your affected arm normally to perform daily living tasks such as brushing your teeth, putting on deodorant on, or wiping up your kitchen table.

Below are two examples of Pilates exercises for breast cancer survivors that fall under the Protective Phase. Protective Phase exercises should have three to five repetitions each. This phase will last approximately 2 weeks, or until you feel comfortable progressing to more difficult exercises. The exercises should feel easier and there should be less and less discomfort as you progress.

Exercise 1: Scapula Protraction and Retraction

The scapula is another name for your shoulder blade. The purpose of this exercise (shown in the image below) is to warm up the shoulders in preparation for movement, as well as strengthen the scapular muscles, which are necessary for proper shoulder movement.

Contraindications: None

Equipment: Pad, small pillow, towel, or block under head if needed. Optional medium-sized ball (squeezing the ball between your knees will help to activate the pelvic floor and transverse abdominis muscles and prevent your knees from collapsing in).

Start:

  • Lie on your back with both knees bent and feet on the ground, hip distance apart.
  • Pelvis is level with the floor or slightly tilted toward your nose if you have back problems.
  • Arms and fingertips are reaching toward the ceiling only to shoulder height.
  • Optional: Squeeze ball between your knees.

Exercise:

  • Inhale, and reach fingers tips toward the ceiling (shoulder blades will lift off the mat). This is protraction.
  • Exhale, and bring your shoulder blades together (not too hard) as you imagine you are gently cracking a walnut between your shoulder blades. This is retraction.

Modification for an Added Challenge: Stretch a resistance band between your hands. If you are undergoing a breast implant expander program, TRAM, or DIEP flap reconstruction, do not use a resistance band until medically cleared.

Exercise 2: Bridging

The goal of bridging is to warm up the spine as well as your hamstrings and gluteal muscles. This exercise will help make it easier to put on your underwear and pants and reposition yourself in bed.

Contraindications: Check with your physician to make sure that this exercise is safe for you to do when recovering with drains in place.

Equipment: Pad, small pillow, towel, or block under head if needed. Optional medium-sized ball (squeezing the ball between your knees will help to activate the pelvic floor and transverse abdominis muscles and prevent your knees from collapsing in).

Start:

  • Lie on your back with both knees bent and feet on the ground, hip distance apart.
  • Pelvis is level with the floor or slightly tilted toward your nose if you have back problems.
  • Arms are long at your sides.
  • Optional: Squeeze ball between your knees.

Exercise:

  • Inhale to start, and then exhale as you tilt your pelvis toward your nose to imprint your spine.
  • Then push off through your heels, and lift your spine off the mat one vertebrae at a time. You will start moving the lower back, middle back, and then upper back off the mat.
  • Inhale as you hold this position at the point where you can remain still, without any movement of your pelvis. Both the upper part of your shoulder blades should remain on the mat.
  • Exhale as you return to the start position by gradually bringing the upper back, middle back, and lower back gently down to the mat, vertebrae by vertebrae to your neutral or imprinted pelvis. Think of rolling the spine slowly down to the floor.

NOTE: Be sure to… Keep both shoulder blades on the mat. Do not let the pelvis rock forward/back or side to side.

Modification for an Added Challenge: Hold a Magic Circle between your inner thighs for resistance as you lift your hips. Hold a Magic Circle between your palms with hands facing each other and fingertips toward the ceiling. Squeeze it when the hips are lifted.


Written by Naomi Aaronson and Ann Marie Turo. Reprinted with permission from Naomi Aaronson, MA, OTR/L, CHT; Also published on demosHEALTH; Images via demosHealth article.

Naomi Aaronson, MA, OTR/L, CHT can be reached at www.recovercisesforwellness.com.

Aerobic Pilates personal trainer instructor women

Pilates for Breast Cancer Survivors: Research and Findings

Pilates was first developed by Joseph Pilates to strengthen muscles, increase flexibility, and improve overall health. In the 1950s, Pilates started using his method to rehabilitate dancers, including one of his first protégés, Eve Gentry. She was rehabilitated by Joseph Pilates after a radical mastectomy for breast cancer. After studying Pilates, she was able to regain full use of her arm and torso, a remarkable feat because all of her lymph nodes and chest muscles, as well as breast tissue, were removed with this procedure. Doctors could not believe the success that she had obtained with the Joseph Pilates method; he was a man ahead of the times.

Recent research and studies have helped supported Pilates’ work and demonstrate its benefits for recovering from breast cancer surgery.

Recent Research and Findings

Aerobics Pilates personal trainer helping women groupThe first study on the benefits of Pilates for breast cancer survivors was completed by physical therapists in 2008 [1]. It was a pilot study with only four participants, so the conclusions we can draw from this study are limited. However, they found that Pilates increased the flexibility of the affected arm after a twelve-week program, with participants exercising three times a week.

Another study done in 2010 [2] examined the effects of Pilates exercises on functional capacity, flexibility, fatigue, depression, and quality of life in female breast cancer patients. Pilates was performed three times a week for eight weeks. After participation in the Pilates exercises, improvements were noted in the participants’ levels of fatigue, flexibility, quality of life, and performance on a six minute walk test. This study helped demonstrate that Pilates was safe and effective for breast cancer survivors.

The most recent study published in 2012 [3] found that after twelve weeks of Pilates, thirteen participants improved their shoulder and neck flexibility. Improvements were noted in quality of life, body image, and mood. Although volume increased on the affected arm (a sign of lymphedema), one must note that this program did not modify the exercises for the class and that the sessions increased in frequency over the twelve-week period.

It is important to note that traditional Pilates mat exercises were used for the studies listed above, and minimal modifications were used which may have affected the results. However, all of these documented results help confirm that Pilates is a gentle but effective way to regain strength and recover from breast cancer.

Footnotes:
Keays, K, Harris, S, et al. “Effects of Pilates Exercises on Shoulder Range of Motion, Pain, Mood and Upper Extremity Function in Women Living with Breast Cancer: A Pilot Study.” Physical Therapy 88(4) (2008): 494–510.

Eyigor, S, Karapolat, H, et al. “Effects of Pilates Exercises on Functional Capacity, Flexibility, Fatigue, Depression and Quality of Life in Female Breast Cancer Patients: A Randomized Study.” European Journal of Physical Medicine 46(4) (2010): 481–87.

Stan, DL, Rausch, SM, et al. “Pilates for Breast Cancer Survivors: Impact on Physical Parameters and Quality of Life After Mastectomy.” Clinical Journal of Oncology Nursing 16(2) (2012): 131–41.


Written by Naomi Aaronson and Ann Marie Turo. Reprinted with permission from Naomi Aaronson, MA, OTR/L, CHT; Also published on demosHEALTH.

Naomi Aaronson, MA, OTR/L, CHT can be reached at www.recovercisesforwellness.com.

Aerobics pilates women feet  with yoga balls

The 9 Principles of Pilates

For breast cancer survivors using Pilates, it is extremely important to pay attention to the Pilates principles. Getting physical exercise is essential to recovery, but overdoing it can cause more harm than good. Make sure you review the principles below before beginning Pilates for breast cancer recovery, and ask for help from a certified Pilates instructor if you need it.

The 9 Pilates Principles

These principles guide each Pilates exercise to ensure that they are done correctly and safely. In Pilates, less is more. The emphasis is on a correct starting position with proper execution of the exercises; there is no wasted movement in Pilates. No more than five to eight repetitions are completed (except for the Hundreds), and breathing during each exercise is very important. Concentrate on the correct movement patterns first and then add Pilates breathing.

pilates woman stability ball gym fitness yogaIf you’ve never done Pilates before, this may sound like a lot to think about. If possible, we recommend working with someone who is trained in Pilates first to get you on the right track.

  1. Breathing: Breathing oxygenates the blood and connects the mind and body. Breathing during Pilates will enhance your relaxation, improve your focus, and help to activate your muscles. Pilates breathing is called “rib cage breathing” or costal breathing as the rib cage expands as you inhale and knits together as you exhale. Coordinating the breath with the movement is the goal. This may be difficult at first, but please stay with it. If you get confused, don’t hold your breath—keep breathing!
    • Inhale through the nose as if to smell the roses. Place your fingers on your rib cage and feel your rib cage expand.
    • Exhale through pursed lips as to blow out candles, drawing the belly in towards your spine. This activates the transverse abdominas muscle. The deeper the exhalation, the more this muscle is activated. Activation of this muscle should feel very gentle, as it is more like a subtle tightening of the abdomen. The lower back and pelvis should remain still. Buttocks and thighs should stay relaxed.
  2. Concentration: You must place intentional focus on every movement. You will feel each exercise more if you close your eyes, once you become more familiar with the movements. After breast cancer surgery, you may lose the ability to feel if muscles are working properly. Closing your eyes will help in this process to listen to your body and refocus your mind upon proper body movement.
  3. Control: To be in control means that you maintain the proper form, alignment, and effort during the exercise. You don’t want to throw your body around. If there is jerkiness, shaking, tightness and/or pain you are not in control. You can limit the movement and make it smaller if necessary to regain control.
  4. Centering: In Pilates, all movements come from the “powerhouse,” or core abdominal muscles. Learning to use the powerhouse correctly will improve your posture, stabilize the spine, and improve your quality of movement. Thus, every exercise is an abdominal exercise. Visualizing a corset around the waist will help you to activate these muscles.
  5. Precision: Every exercise should be performed with precision and an emphasis upon proper form. Therefore, proper starting position and posture is crucial as well as performing the exercises slowly without momentum.
  6. Pilates aerobic personal trainer man in cadillacBalanced Muscle Development: Everything that is done on one side of the body must also be done on the other side. For example, if you do an exercise with your right arm, you must also do it with your left.
  7. Rhythm/Flow: All movements in Pilates are done with a sense of rhythm. The movements should be graceful and smooth.
  8. Whole Body Movement: The whole body is engaged through breathing, engagement of the core, and use of the arms and legs (even though some exercises will not use the arms at all).
  9. Relaxation: Breathing assists with the relaxation of muscles throughout the body. Unwanted tension should be released prior to beginning the exercises. You may work one body part and relax the others

Written by Naomi Aaronson and Ann Marie Turo. Reprinted with permission from Naomi Aaronson, MA, OTR/L, CHT; Also published on demosHEALTH.

Naomi Aaronson, MA, OTR/L, CHT can be reached at www.recovercisesforwellness.com.